Start your 3-day free trial
Sign up to experience all premium features at no cost.
*Available only to new users. Each user is limited to one trial.
To learn how to write AI image prompts, stop treating a prompt as a bag of stylish adjectives. Start with a visual brief, describe the subject and scene in observable terms, add composition and lighting choices, then test one change at a time against a fixed scoring rubric.
The general prompt-writing guide explains goals, context, output formats, and follow-up questions. This article focuses on visual variables: what occupies the frame, how the viewer sees it, which relationships must remain stable, and how to tell whether a revision actually improved the image.
Key Takeaways
- A good image prompt begins with a visual brief and a measurable use case.
- Subject, action, environment, medium, light, color, mood, composition, and ratio are separate controls.
- Reference images can guide content or composition, but they need permission and clear provenance.
- Constraints should protect the brief, not become an endless negative list.
- Change one prompt axis per round and score every candidate with the same rubric.
Describe a frame another person could sketch from your words. Name the main subject, what it is doing, where it is, the visual medium, the light, the composition, and the output ratio. Then state only the constraints that prevent a known failure.
Midjourney’s current documentation defines a prompt as the input that guides generation and recommends clear descriptions of what you want to see. Its image-prompt documentation also distinguishes text instructions from reference images that influence content, composition, and color.[1][2] Those platform controls may change, but the underlying planning questions stay useful across tools.
A brief is an editorial contract. It describes the image’s job without depending on generator syntax. Use six lines:
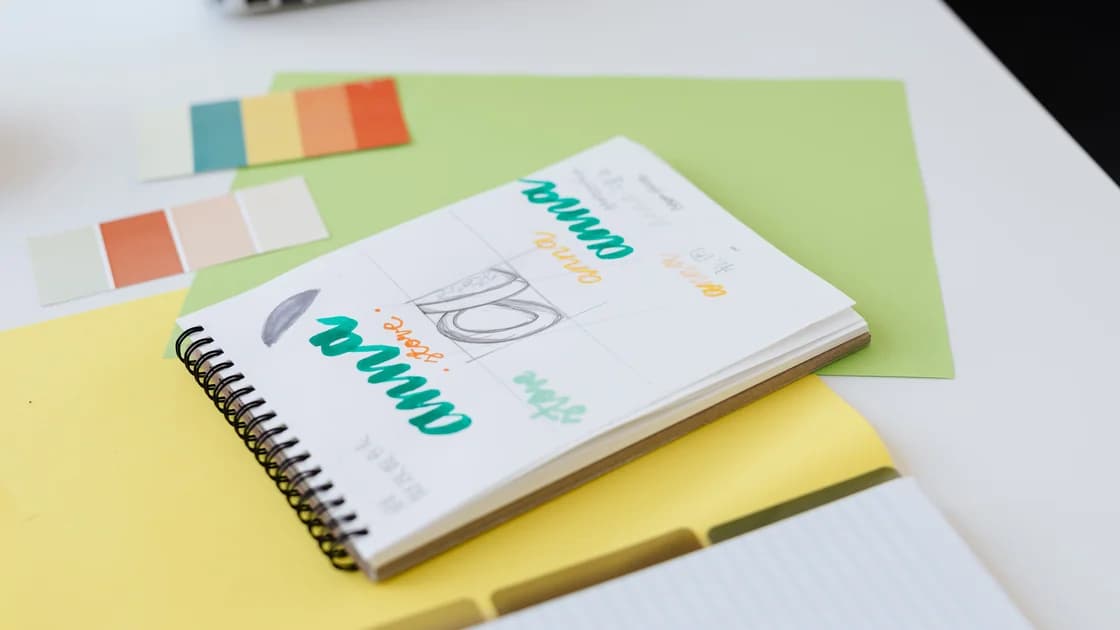
For example: “Create a wide editorial image for a beginner guide about prompt planning. Show a physical sketchbook, color swatches, and one simple composition thumbnail. Keep a clear area for layout. Do not show a product screen, logo, or person.”
That brief can be implemented with photography, illustration, a deterministic diagram, or generation. If generation is chosen, the prompt is one implementation of the brief—not the source of truth.
Work through these eight steps in order so each revision remains attributable to one deliberate choice.
Lead with the most important visible noun and a concrete action or state. “Ceramic teapot on a linen cloth” gives the model more structure than “cozy product shot.” If motion matters, say what is moving and in which direction.
Useful subject details include count, material, shape, age, condition, and relative size. Add only details that affect the decision:
Avoid stacking synonyms. “Beautiful, stunning, gorgeous, premium, award-winning” does not specify a visual difference. Replace them with material, light, framing, or spatial relationships.
The environment explains scale, context, and story. Name the location, surface, background distance, weather or time of day when those details matter. A subject floating against an undefined background can look like a catalog cutout even when you intended a lived-in scene.
Describe relationships instead of inventory. “A sketchbook open beside two color swatches, with a pencil crossing the lower corner” is clearer than a list of sketchbook, swatches, pencil, desk, lamp, plant, camera, phone, and coffee. Every additional object competes for attention and creates another opportunity for duplication or malformed geometry.
For a clean composition, decide which objects may be partially cropped and which must remain complete. If the image will be used as a card, protect the central subject and avoid placing essential information at the extreme edges.
State whether you want an editorial photograph, flat vector illustration, ink drawing, paper collage, watercolor, 3D render, or another medium. Do not mix incompatible media unless the mixture is the actual concept.
Then describe physical or graphical properties:
| Vague request | More observable instruction |
|---|---|
| Professional | Neutral background, controlled side light, clean object spacing |
| Cinematic | Wide frame, directional backlight, deep shadows, restrained color palette |
| Vintage | Faded print colors, visible paper grain, period-appropriate objects |
| Minimal | One main subject, two supporting objects, large negative space |
| Realistic | Plausible materials, consistent shadows, natural perspective, ordinary wear |
Do not name a living artist as shorthand for a look. Describe the properties you need. This produces a more transferable prompt and avoids turning another person’s distinctive body of work into an unexplained preset.
Light is a physical instruction: source, direction, softness, and time. Color is a palette instruction. Mood is the emotional reading produced by the scene. Keeping them separate makes revision easier.
Adobe’s current guidance also recommends clear, simple language and specific visual details rather than long strings of commands.[3] That is a useful cross-platform rule: make each phrase describe something a reviewer can see.
For example: “Soft window light from the right, low contrast, muted green and warm wood palette, calm and methodical mood.” If the result is too dark, change light or contrast without rewriting the subject. If it feels playful instead of methodical, change palette and object arrangement without changing the camera.
Beware of impossible combinations such as hard noon shadows with diffuse overcast light. A generator may reconcile the contradiction unpredictably, and you will not know which instruction to revise.
This deterministic diagram is a planning aid, not a product interface or generated result.
Composition tells the viewer where to look. Camera terms are useful when they map to visible framing rather than acting as decorative jargon.
Choose from a small set of decisions:
A complete composition phrase might be: “Three-quarter overhead view, main sketchbook on the right third, swatches forming a diagonal toward it, shallow background detail, clear negative space on the left, wide 16:9 frame.”
Do not request a specific lens merely because it sounds photographic. Use lens or focal-length language only when you understand the expected perspective and distortion. “Natural perspective with straight object edges” may communicate the actual requirement better.
Positive instructions describe the target. Constraints prevent a known mismatch. Use a short, prioritized list:
No people, no hands, no logos, no product interface, no repeated objects, and no readable private information.
Some tools expose negative-prompt controls while others interpret exclusions inside the main prompt. Do not assume one syntax works everywhere. Check current platform documentation and keep the brief’s forbidden claims outside the tool as a review checklist.
Constraints cannot guarantee compliance. “No logo” does not remove the need to inspect logo-like marks. “Exactly three objects” does not remove the need to count them. The prompt asks; the review verifies.
A reference image can guide composition, color, subject, or style. Midjourney’s current image-prompt documentation says references influence a new creation rather than instructing a precise edit of the source.[2] That distinction matters: if you need an exact local change, use an editing workflow and preserve the original.
Before uploading a reference, record:
Crop a reference only to remove irrelevant material when your permission allows it. Do not use someone’s portrait, private interior, unpublished design, or client asset as a casual composition hint. For local changes to an owned image, use the separate realistic AI photo-editing workflow.
The U.S. Copyright Office addresses digital replicas, copyrightability, and AI training as separate issues. Treat that material as a U.S.-specific reference point, and do not infer a case-specific ownership or permission outcome from a prompt or generated result.[4]
Save the first prompt as version 1. Score its candidates, identify the most important mismatch, and change one axis.
| Version | Single change | Expected effect | Observed effect | Keep? |
|---|---|---|---|---|
| V1 | Baseline | Establish composition | Subject too centered | No |
| V2 | Move subject to right third | Create left negative space | Space improved | Yes |
| V3 | Soften side light | Reduce harsh shadows | Texture became clearer | Yes |
| V4 | Add two extra props | Make scene lived-in | Frame became cluttered | Revert |
This log prevents accidental regression. It also reveals when the generator ignores a requirement across multiple rounds. At that point, change the production method instead of adding more prompt weight to an instruction the tool cannot reliably satisfy.
If you need the complete generation and candidate-selection loop, follow the text-to-image workflow.
Score the output, not the elegance of the sentence. Use the same five categories for every candidate, from 0 to 2:
A high total does not override a hard failure. An unresolved face, false product screen, misleading event, or unusable crop can reject a candidate regardless of the other scores.
Use this template as a checklist, not as mandatory prose:
Subject and action: [main visible subject, count, material, state, action]. Environment: [location, surface, background relationship]. Medium: [photograph, illustration, collage, render]. Light and color: [source, direction, softness, palette]. Mood: [one clear emotional quality]. Composition: [distance, angle, placement, depth, negative space]. Output: [aspect ratio and destination]. Constraints: [short list tied to rights, truth, structure, or crop].
Remove empty fields. A concise prompt with six intentional choices is better than a long template filled with generic words.
Include the main subject and action, environment, medium, light, color, mood, composition, output ratio, and a short list of necessary constraints. Omit fields that do not affect the result.
No. Length helps only when every phrase adds a compatible visual decision. A shorter prompt is often easier to debug because you can see which instruction changed the output.
Use platform-specific negative controls only after checking current official instructions. Keep critical exclusions in your external review checklist because no prompt syntax guarantees that an unwanted element is absent.
Describe the visual properties you need instead of using a living artist’s name as a shortcut. This makes the prompt clearer, easier to transfer, and less dependent on imitating a distinctive body of work.
Change one meaningful axis at a time, such as composition, light, object count, or palette. Record the expected and observed effect before making the next change.
They can influence content, composition, or color, but they do not guarantee precise copying or editing. Use only references you are allowed to upload and record the property they should influence.
The prompt may contain conflicting priorities, too many objects, or a requirement the tool handles inconsistently. Simplify the brief, raise the important instruction earlier, and stop when repeated evidence shows the method is a poor fit.
Disclaimer: This article provides general creative-workflow information, not legal advice. Verify ownership, consent, platform terms, and publication requirements for every reference and output.
Sources:
Sources checked 24 August 2026.
Related Articles:
Sign up to experience all premium features at no cost.
*Available only to new users. Each user is limited to one trial.