Start your 3-day free trial
Sign up to experience all premium features at no cost.
*Available only to new users. Each user is limited to one trial.
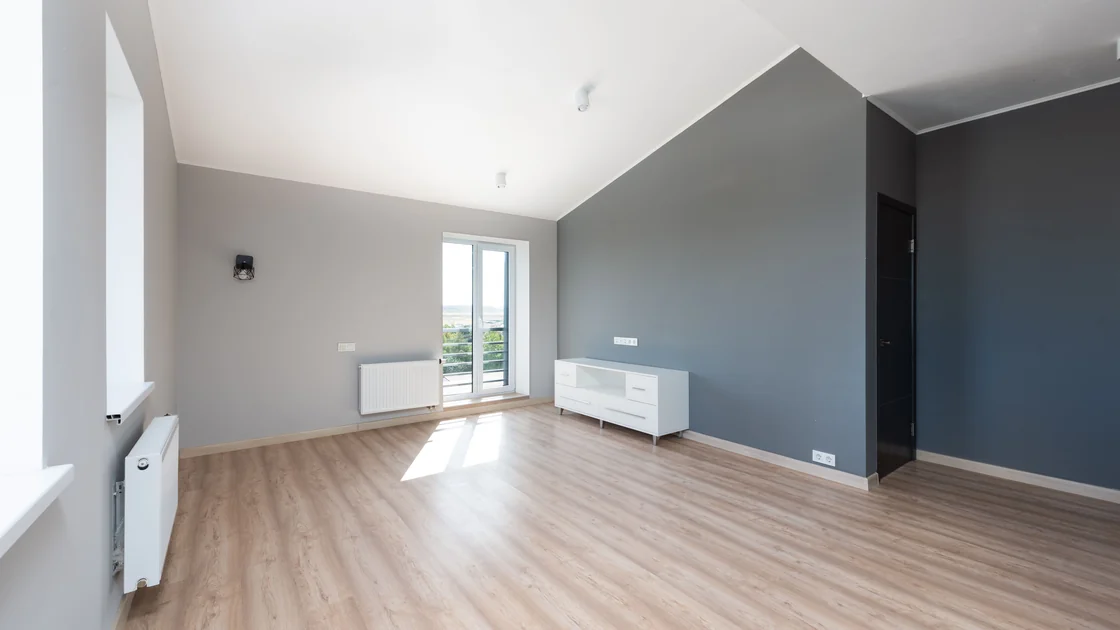

To document an apartment condition when moving in abroad, inspect the empty home in a fixed room order, record both normal condition and existing damage, label photographs and video consistently, add keys and meter readings, and obtain a dated report that both sides can retain. The goal is a shared, traceable baseline—not a large folder of unexplained images.
Key Takeaways:
- Arrange the inspection for when you receive access and before belongings hide floors, walls, or fixtures.
- Use the lease, inventory, and a room list so every included item is checked once.
- Combine wide context photographs with close details and a written issue list.
- Record keys, remotes, safety defects, meters, and utility status separately.
- Preserve original files, use consistent names, and share only the minimum private material required.
- Ask both parties to sign and keep the same report; document absence, refusal, and later discoveries in writing.
British Columbia describes a joint move-in inspection to document damage or concerns; New Zealand guidance recommends photographs, signatures, dates, and a copy for each party.[1][2] These are local examples, not universal deadlines. Use the relocation checklist for the wider move, then check the tenancy law and forms where the apartment is located.
Collect the signed lease, property inventory, building rules, promised repair list, key handover record, and any official condition-report form required locally. Confirm the exact unit, storage area, parking space, furniture, appliances, and common facilities included in the tenancy. Do not add a landlord's private document or a previous tenant's personal information to your evidence file unless it is lawfully necessary.
Arrange a time when the unit is empty, well lit, and accessible. Invite the landlord or authorized agent through a written channel and record who will attend. If you need an interpreter, accessibility support, or more time, request it before the appointment rather than rushing through a form you cannot fully understand.
Prepare a simple inspection kit:
The inspection records condition and unresolved issues; it is not permission to dismantle fixtures or test dangerous equipment. Escalate serious gas, electrical, fire, water, structural, or security concerns through the appropriate local channel.
This inspection begins after you have lawful access. It does not replace the payment and authority checks in the apartment verification guide.
Start at the entrance and follow the same direction around every room—such as doorway, left wall, windows, right wall, ceiling, floor, then fixtures. A fixed route makes omissions easier to spot and lets another person understand the record later.
For each room, first take a wide photograph from the doorway and the opposite corner. Then inspect surfaces and included items. Record both “no visible issue” and specific defects; otherwise silence can be mistaken for an uninspected area.
Use a checklist such as:
| Area | Condition to record |
|---|---|
| Walls and ceilings | Marks, cracks, holes, stains, damp, unfinished repairs |
| Floors and skirting | Scratches, chips, loose boards, burns, carpet stains |
| Doors and windows | Locks, handles, seals, glass, frames, opening and closing |
| Lights and outlets | Visible damage and ordinary operation where safe to test |
| Kitchen | Cabinets, worktops, sink, taps, appliances, extractor, inventory |
| Bathroom | Sanitary ware, sealant, drainage, ventilation, leaks, mold signs |
| Furniture | Item identity, stains, tears, chips, missing parts, stability |
| Exterior allocation | Balcony, storage, mailbox, parking, or garden condition |
Do not stage damage, move another person's possessions, or use destructive tests. If a cupboard, meter room, roof space, or service panel is locked or unsafe, record that it was inaccessible and ask for an authorized follow-up.
British Columbia's official guidance recommends checking while the rental is empty and before the new tenant has moved in.[1] Apply that timing only where practical and reconcile it with the local form, access rights, and appointment rules.
Use three levels of evidence: a wide view that proves the room, a medium view that shows the object's location, and a close view that shows the defect. Include a ruler or neutral reference only when size matters and doing so will not damage the surface. Avoid digital filters, beauty modes, annotations that overwrite the original, or edits that change color and texture.
For every issue, write a short neutral description. “Bedroom north wall: two paint chips beside window, approximately at handle height” is more useful than “wall damaged.” Note whether an appliance was not tested, appeared not to power on, or had a visible defect; do not claim a technical cause you did not establish.
A slow room video can show continuity, but it should supplement—not replace—still images and the written report. Move steadily, say the room and direction, and avoid capturing faces, identity documents, account numbers, neighboring homes, conversations, or private possessions that do not support the condition record.
New Zealand Tenancy Services says photographs can support the condition record and both sides should sign, date, and retain the report.[2] A photograph is not automatically conclusive evidence; its value depends on context, timing, local law, and the decision-maker.
Keys, access devices, meters, and safety issues are easy to lose inside a room checklist, so give them separate tables.
For access items, record:
Test ordinary locks only from a safe position and avoid locking yourself out. Report a door that does not secure, a missing key, a broken window latch, or an unclear emergency exit promptly through the agreed written route.
For utilities, photograph safely accessible meter faces, serial numbers, readings, units, and location. Record whether a reading is actual, estimated, shared, prepaid, or inaccessible. Do not remove seals or operate unknown equipment. The utilities setup guide covers accounts; this article only establishes the starting condition.
List urgent hazards separately from cosmetic condition. A suspected gas leak, exposed electrical conductor, active water leak near electricity, broken exterior lock, missing smoke alarm, unstable fixture, or blocked exit needs a prompt safety response. Do not bury it as photo number 87.
Create a simple structure that another person can follow without your memory. Keep one folder for originals, one for shareable copies, and one for the signed report and correspondence. Use local storage plus a protected backup you control.
A useful filename pattern is:
YYYY-MM-DD_room_sequence_subject_view.ext
For example, use 2026-08-30_kitchen_03_sink-wide.jpg. Timestamps may change during transfer, so repeat the date, room, item, and issue number in the written index.
Build an issue table:
| ID | Room and item | Observation | File references | Requested action |
|---|---|---|---|---|
| K-01 | Kitchen sink | Slow drainage; cause not established | kitchen 03–05 | Inspect and confirm response |
| B1-02 | Bedroom wall | Two existing paint chips | bedroom 06–08 | Add to signed report |
| A-01 | Entrance | One building fob received | access 01 | Confirm expected quantity |
Preserve the original folder, record how you shared the copy, and keep the upload receipt or acknowledgment.
Protect privacy proportionately. A condition report does not normally need passport pages, bank details, family photographs, passwords, entry codes, or footage of neighboring homes. Restrict recipients and check a property portal's retention rules.
Compare the written report with the property before signing. Correct the unit, date, names, inventory, and issue references. If the form offers a tenant-comments area, record disagreements precisely rather than signing a statement you know is inaccurate without qualification.
Both sides should sign and date the same version where the local process permits or requires it. Each should retain a complete copy, including attachments and continuation pages. British Columbia's process includes an opportunity to record disagreement and jurisdiction-specific duties around giving the tenant a copy; New Zealand also recommends that both sides sign, date, and retain the report.[1][2] Check the local form and deadlines rather than borrowing either jurisdiction's timing.
Electronic confirmation should identify the document version, date, sender, recipients, and attachments. Record later corrections in a dated amendment that preserves the earlier version.
Follow the local required process first. Some jurisdictions specify forms, invitations, opportunities to attend, delivery methods, or deadlines. Do not assume that sending photographs within a period used elsewhere preserves your rights.
If the other party is absent, record the appointment invitation, attendance, access time, inspection method, files, and delivery receipt. Send a concise report through the contractual or official channel and ask for acknowledgment. If they refuse to sign, do not fabricate agreement; preserve the refusal and seek guidance from the local tenancy authority, adviser, dispute service, or qualified lawyer.
Some problems appear only after ordinary use. Stop further harm where safe, record the discovery date and context, notify the responsible party promptly in writing, and ask for the issue to be cross-referenced to the initial report. New Zealand guidance recommends prompt notice of later-discovered damage; its remedies remain specific to New Zealand.[2] Evidence may inform whether a condition existed, whether it needs urgent repair, and who bears cost, but does not answer those questions automatically.
To document an apartment condition when moving in abroad, inspect before belongings obscure the space, combine records, index issues, preserve originals, and obtain a copy. Follow local rules and deadlines, and keep safety issues separate from disputes.
Before, where the local process and access arrangements allow. Empty floors, walls, fixtures, and included furniture are easier to see and document, but the required timing depends on the tenancy rules where the property is located.
Take a wide room view, medium views of fixtures and included items, and close views of each defect. Pair them with a written room, location, observation, and issue number.
No. They can support a condition record, but their weight depends on authenticity, context, timing, the agreement, local law, and the decision-maker. Use the official report and process where one exists.
Keep the written invitation and attendance record, complete the inspection carefully, deliver the report through the required channel, and preserve proof of delivery. Check local rules before assuming a self-completed report is sufficient.
Describe the disagreement next to the specific item, attach the relevant files, and preserve both parties' wording. Do not erase the other account or sign an unqualified statement you believe is false.
Record when and how you discovered it, prevent further harm where safe, notify the responsible party promptly, and ask for a written amendment or cross-reference. Local notice and repair rules control the next step.
Keep originals in protected storage, restrict recipients, remove unrelated private material from shareable copies, and avoid broadly sharing entry codes, IDs, account numbers, neighbors, or family possessions.
Sources checked 29 August 2026.
This article provides general tenancy and recordkeeping information, not legal, housing, safety, or professional advice. Inspection forms, attendance rules, deadlines, evidentiary value, repairs, deposits, and dispute procedures vary by jurisdiction and agreement.
Sign up to experience all premium features at no cost.
*Available only to new users. Each user is limited to one trial.